
Building Korean Query Auto-completion using Elasticsearch
Query auto-completion (QAC) is a feature that suggests completions for a user’s input query. It tries to guess what you’re about to type and throws out suggestions, commonly based on past searches. Pretty much every site or app with a search box has it—Google, YouTube, Amazon, Naver, you name it. It’s just one of those things we use every day.

(YoutTube’s query auto-completion)
This post is a walk-through of building Korean query auto-completion feature based on past searches using Elasticsearch.
What problems does query auto-completion solve?
- Typing can be slow and error-prone. This gets even trickier depending on the user’s environment like mobile. For car navigation, query auto-completion isn’t just nice to have, it’s a must.
- Users sometimes don’t know the exact keywords to search. Query auto-completion helps them find what they want faster, even if they’re not sure what to type.
How is Korean query auto-completion different from English?
The simplest way to build query auto-completion is using just simple prefix matching.
For English, that could be enough with some lowercasing thrown in.
For example, if your dataset includes apple, autocomplete, and artificial intelligence, typing just a or A will match all of them.
For Korean, that approach doesn’t quite cut it.
Say your dataset includes 가구 (furniture), 간식 (snack), and 겨울 코트 (winter coat).
They all start with the consonant ㄱ, but if a user types just ㄱ, none of those will match.
That’s because ㄱ, 가, 간, and 겨 are completely different characters.
If you want 가구 to show up in the suggestions, you have to type at least 가.
To give users a better experience, you need to break Hangul syllables apart into their building blocks—a process called syllable decomposition. That’s the key to making Korean auto-completion actually work better.
Hangul syllables and Jamo
Hangul (한글) is the Korean alphabet, made up of Hangul Jamos (자모). These Jamos are the Korean consonants and vowels, which are basically the building blocks of Korean syllables. There are 19 consonants and 21 vowels in Jamo.
19 consonants:
| Hangul | ㄱ | ㄲ | ㄴ | ㄷ | ㄸ | ㄹ | ㅁ | ㅂ | ㅃ | ㅅ | ㅆ | ㅇ | ㅈ | ㅉ | ㅊ | ㅋ | ㅌ | ㅍ | ㅎ |
|---|---|---|---|---|---|---|---|---|---|---|---|---|---|---|---|---|---|---|---|
| Initial RR | g | kk | n | d | tt | r | m | b | pp | s | ss | – | j | jj | ch | k | t | p | h |
| Final RR | k | k | n | t | – | l | m | p | – | t | t | ng | t | – | t | k | t | p | t |
- Initial RR: Romanization of consonants at the start of a syllable. These are the sounds you hear starting a Korean syllable.
- Final RR: Romanization of consonants at the end of a syllable. “-“ means these letters don’t appear at the end of syllables.
21 vowels:
| Hangul | ㅏ | ㅐ | ㅑ | ㅒ | ㅓ | ㅔ | ㅕ | ㅖ | ㅗ | ㅘ | ㅙ | ㅚ | ㅛ | ㅜ | ㅝ | ㅞ | ㅟ | ㅠ | ㅡ | ㅢ | ㅣ |
|---|---|---|---|---|---|---|---|---|---|---|---|---|---|---|---|---|---|---|---|---|---|
| RR | a | ae | ya | yae | eo | e | yeo | ye | o | wa | wae | oe | yo | u | wo | we | wi | yu | eu | ui/yi | i |
Here are some examples of Korean syllables made by combining jamos:
| Syllable | Romanization | Meaning |
|---|---|---|
| 가 | ga | (depends on context) |
| 옷 | ot | clothes |
| 사과 | sagwa | apple |
| 크림 | keurim | cream |
That’s pretty much it. Once you’ve got this down, you can read and write almost any Korean.
Hangul system is remarkably unique in that its letters are made to look like the mouth and tongue shapes used to say the sounds. It is designed so that anyone can easily learn to read and write.
The example in this post uses the following software versions:
- Python 3.13.4 (with
pip install elasticsearch==8.13.2 "fastapi[standard]" aiohttp) - Elasticsearch 8.13.4
- Kibana 8.13.4
Elasticsearch and Kibana are running locally at http://localhost:9200 and http://localhost:5601, respectively.
Context
You’re building an e-commerce application with a search bar. Every time a user types a search query, you’re logging that into an Elasticsearch index called search-logs with the following mappings:
PUT /search-logs
{
  "mappings": {
    "properties": {
      "@timestamp": {
        "type": "date"
      },
      "query": {
        "type": "keyword"
      },
      "user_id": {
        "type": "keyword"
      }
    }
  }
}
For demo purposes, let’s insert some sample data:
POST /search-logs/_bulk
{"index":{}}
{"@timestamp":"2025-06-21T09:00:00Z","query":"가구","user_id":"user1"}
{"index":{}}
{"@timestamp":"2025-06-21T09:00:01Z","query":"가방","user_id":"user2"}
{"index":{}}
{"@timestamp":"2025-06-21T09:00:02Z","query":"가방","user_id":"user3"}
{"index":{}}
{"@timestamp":"2025-06-21T09:00:03Z","query":"간식","user_id":"user4"}
{"index":{}}
{"@timestamp":"2025-06-21T09:00:04Z","query":"겨울 코트","user_id":"user5"}
{"index":{}}
{"@timestamp":"2025-06-21T09:00:05Z","query":"사과","user_id":"user6"}
{"index":{}}
{"@timestamp":"2025-06-21T09:00:06Z","query":"1234567890","user_id":"user7"}
{"index":{}}
{"@timestamp":"2025-06-21T09:00:07Z","query":"airpods 4","user_id":"user8"}
Solution
There are plugins like nori for Korean, but I’m skipping those to build the logic ourselves for full control and to better understand how Korean QAC actually works under the hood.
Another possible solution is using Edge n-gram tokenizer.
With this approach, you can set up a custom tokenizer in your index and tweak options like min_gram, max_gram, and token_chars to fine-tune how autocomplete behaves.
That said, I won’t be covering this method here.
Instead, I’ll use Elasticsearch’s completion suggester which is a more purpose-built option.
I’ll also take a look at its limitations and walk through ways to gradually improve the experience.
Version0: Simple prefix matching
Start simple.
No syllable decomposition, just raw keyword prefix matching using Elasticsearch’s completion suggester.
First, create a keyword suggestion index named search-keywords:
PUT /search-keywords
{
  "mappings": {
    "properties": {
      "suggest": { // you can use any name here instead of "suggest"
        "type": "completion",
        "analyzer": "standard"
      }
    }
  }
}
The completion suggester is designed to be as fast as possible because auto-completion should keep pace with your typing, giving you instant, relevant suggestions as you go.
This is why auto-completion is also often called as “search-as-you-type” functionality.
We also use the standard analyzer instead of the default simple analyzer to make sure numbers are handled properly.
The simple analyzer strips out digits completely, so a query like “1” won’t match “1234567890” in our dataset.
The standard analyzer keeps numbers intact—so numeric queries work just like you’d expect.
Now that we have two indices, search-logs and search-keywords, we can read from search-logs and populate search-keywords using this Python script:
# update_keywords0.py
from dataclasses import dataclass

from elasticsearch import Elasticsearch, helpers


def main():
    hosts = ["http://localhost:9200"]
    username = "elastic"
    password = "elasticpassword"
    with Elasticsearch(hosts=hosts, basic_auth=(username, password)) as es_client:
        top_queries = _get_top_queries_from_search_logs(es_client=es_client, size=10000)
        success_count = _update_search_keywords(es_client, keywords=top_queries)
        print("Success count:", success_count)


@dataclass
class Keyword:
    key: str
    count: int


def _get_top_queries_from_search_logs(es_client: Elasticsearch, size: int) -> list[Keyword]:
    """
    Get the top search queries from the search log index.
    We use composite aggregation to handle large datasets efficiently.
    """
    index = "search-logs"

    all_buckets = []
    after_key = None  # for pagination
    while True:
        comp_query = {
            "size": 0,
            "aggs": {
                "top_queries": {
                    "composite": {
                        "size": size,
                        "sources": [{"term": {"terms": {"field": "query"}}}],
                        **({"after": after_key} if after_key else {}),
                    }
                }
            },
        }
        res = es_client.search(index=index, body=comp_query)
        buckets = res["aggregations"]["top_queries"]["buckets"]
        all_buckets.extend(buckets)
        after_key = res["aggregations"]["top_queries"].get("after_key")
        if not after_key:
            break

    # Convert the buckets to a list of Keyword dataclass instances
    keywords: list[Keyword] = []
    for item in all_buckets:
        keywords.append(Keyword(key=item["key"]["term"].strip(), count=item["doc_count"]))

    return keywords


def _update_search_keywords(es_client: Elasticsearch, keywords: list[Keyword]) -> int:
    """
    Update the autocomplete index with new data.
    Return the number of successfully executed actions (including overrides).
    """
    index = "search-keywords"

    actions = []
    for keyword in keywords:
        action = {
            "_op_type": "index",
            "_index": index,
            "_id": keyword.key,
            "_source": {
                "suggest": {
                    "input": [
                        keyword.key,  # Use the keyword itself as input
                    ],
                    "weight": keyword.count,
                }
            },
        }
        actions.append(action)

    res = helpers.bulk(es_client, actions)

    return res[0]


if __name__ == "__main__":
    main()
What it does:
- Aggregates the top queries from
search-logs, using a composite aggregation which efficiently handles large datasets by paginating results. (Without composite aggregation, there is a size limit to the number of buckets.) - Bulk-indexes them into
search-keywordswith:input: the actual queryweight: how often it was searched. This way, more frequently searched keywords show up higher in suggestions.
In practice, if you’re dealing with a large volume of logs, you’ll want to add a range filter to speed things up and avoid processing stale data. For example, here’s how to retrieve search logs from the past week:
{
    "size": 0,
    "query": {"bool": {"filter": [{"range": {"@timestamp": {"gte": "now-7d"}}}]}},
    ...
}
Running the code will output:
Success count: 7
In practice, again, you can run this code periodically to keep your dataset fresh and up to date.
Verify the documents by using _search API in Kibana Dev Tools:
GET /search-keywords/_search
Next up, use FastAPI to expose an endpoint /keyword-suggestions:
# app.py
from contextlib import asynccontextmanager
from typing import Annotated

from elasticsearch import AsyncElasticsearch
from fastapi import Depends, FastAPI, Query
from fastapi.middleware.cors import CORSMiddleware

# Create an Elasticsearch client
hosts = ["http://localhost:9200"]
username = "elastic"
password = "elasticpassword"
es_client = AsyncElasticsearch(hosts=hosts, basic_auth=(username, password))


@asynccontextmanager
async def lifespan(app: FastAPI):
    yield
    print("Closing Elasticsearch client...")
    await es_client.close()


# Create FastAPI app with CORS middleware
app = FastAPI(title="Keyword Suggestion API", lifespan=lifespan)
app.add_middleware(CORSMiddleware, allow_origins=["*"])


def get_es_client() -> AsyncElasticsearch:
    return es_client


@app.get(
    "/keyword-suggestions",
    response_model=list[str],
    summary="Suggest keywords for a given query",
    description="Returns a list of keyword suggestions based on the input query.",
)
async def suggest_keywords(
    es_client: Annotated[AsyncElasticsearch, Depends(get_es_client)],
    query: Annotated[str, Query(description="User input query for keyword suggestions")],
    limit: Annotated[int, Query(description="Maximum number of keywords to return", gt=0)] = 10,
):
    body = {
        "suggest": {
            "keyword-suggest": {
                "prefix": query,
                "completion": {
                    "field": "suggest",
                    "size": limit,
                },
            }
        }
    }
    res = await es_client.search(index="search-keywords", body=body)
    results = []
    for option in res["suggest"]["keyword-suggest"][0]["options"]:
        results.append(option["_source"]["suggest"]["input"][0])

    return results
This FastAPI app handles Korean keyword autocomplete using Elasticsearch. Here’s how it works:
- Set up and manages an Elasticsearch client.
- Expose a
/keyword-suggestionsendpoint that takes a query and an optional limit. - Query the
search-keywordsindex using Elasticsearch’scompletionsuggester. - Return a list of matching keyword suggestions.
The core of the logic lives in this Elasticsearch query:
body = {
    "suggest": {
        "keyword-suggest": {
            "prefix": query,
            "completion": {
                "field": "suggest",
                "size": limit,
            },
        }
    }
}
Here’s a quick breakdown:
prefix: the user’s input—we’re trying to autocomplete this.completion: tells Elasticsearch to use the completion suggester.field: the field in the index we defined to support autocomplete (in this case,suggest).
You can run the app with:
fastapi run
Then head to http://localhost:8000/docs to try it out.
If you hit the endpoint with query=가, you’ll get a response like:
[
  "가방",
  "가구"
]
Note that 가방 comes first because it has a higher weight (i.e., it’s been searched more often).
It’s a simple heuristic: the more people search for something, the higher it shows up.
Here are a couple of limitations:
- Typing a single jamo like
ㄱwon’t return anything even if some keywords start with that consonant. - Typing
갑or가바(a typo or maybe just middle of typing가방) won’t return anything either.
Version1: Syllable decomposition
To support keyword suggestions even when the user types only jamo (like ㄱ, ㄱㄱ, etc.), we need to make a few changes to how we index and search.
We’ll re-create a search-keywords index:
PUT /search-keywords
{
  "mappings": {
    "properties": {
      "suggest": { // you can use any name here instead of "suggest"
        "type": "completion",
        "analyzer": "standard"
      },
      "keyword": {
        "type": "keyword"
      }
    }
  }
}
Now, we’ve separated responsibilities by defining two fields:
suggest: used for querying suggestions.keyword: stores the original keyword to display to users.
Next, we need to break each Korean syllable into its jamos (choseong, jungseong, and jongseong) so the completion suggester can match partial inputs.
Here’s a utility function to do that:
# Hangul.py
"""
Hangul (Korean alphabet) processing utilities.

This module provides functions for working with Korean text, including:
- Extracting initial consonants (choseong)
- Splitting Korean syllables into individual jamo (consonants and vowels)
- Converting Korean text to romanized form based on keyboard layout

The module uses Unicode code points to manipulate Korean characters.
"""

# For long lists, use `extend` in favor of readability

# 19 initial consonants
CHOSEONGS = []
CHOSEONGS.extend(["ㄱ", "ㄲ", "ㄴ", "ㄷ"])
CHOSEONGS.extend(["ㄸ", "ㄹ", "ㅁ", "ㅂ"])
CHOSEONGS.extend(["ㅃ", "ㅅ", "ㅆ", "ㅇ"])
CHOSEONGS.extend(["ㅈ", "ㅉ", "ㅊ", "ㅋ"])
CHOSEONGS.extend(["ㅌ", "ㅍ", "ㅎ"])

# 21 vowels
JUNGSEONGS = []
JUNGSEONGS.extend(["ㅏ", "ㅐ", "ㅑ", "ㅒ"])
JUNGSEONGS.extend(["ㅓ", "ㅔ", "ㅕ", "ㅖ"])
JUNGSEONGS.extend(["ㅗ", "ㅘ", "ㅙ", "ㅚ"])
JUNGSEONGS.extend(["ㅛ", "ㅜ", "ㅝ", "ㅞ"])
JUNGSEONGS.extend(["ㅟ", "ㅠ", "ㅡ", "ㅢ"])
JUNGSEONGS.extend(["ㅣ"])

# 28 final consonants (including no-final)
JONGSEONGS = []
JONGSEONGS.extend([" ", "ㄱ", "ㄲ", "ㄳ"])
JONGSEONGS.extend(["ㄴ", "ㄵ", "ㄶ", "ㄷ"])
JONGSEONGS.extend(["ㄹ", "ㄺ", "ㄻ", "ㄼ"])
JONGSEONGS.extend(["ㄽ", "ㄾ", "ㄿ", "ㅀ"])
JONGSEONGS.extend(["ㅁ", "ㅂ", "ㅄ", "ㅅ"])
JONGSEONGS.extend(["ㅆ", "ㅇ", "ㅈ", "ㅊ"])
JONGSEONGS.extend(["ㅋ", "ㅌ", "ㅍ", "ㅎ"])


def decompose_syllables(text: str) -> list[str]:
    """
    Decompose Hangul syllables into individual jamo (consonants and vowels).

    Example:
        "사과" -> ["ㅅ", "ㅏ", "ㄱ", "ㅘ"]
    """
    array = []
    for character in list(text.replace(" ", "").strip()):
        if "가" <= character <= "힣":  # For Hangul syllables
            offset = ord(character) - ord("가")
            choseong = offset // 588
            jungseong = (offset - (588 * choseong)) // 28
            jongseong = offset - (588 * choseong) - (28 * jungseong)
            array.append([CHOSEONGS[choseong], JUNGSEONGS[jungseong], JONGSEONGS[jongseong]])
        else:
            array.append([character])

    return [char for sublist in array for char in sublist if not char == " "]
To explain in detail, there are 19 initial consonants * 21 vowels * 28 final consonants (including no-final) = 11,172 possible combinations for modern Hangul syllables.
And they occupy consecutive Unicode code points staring at U+AC00 (“가”, 44032) and ending at U+D7A3 (“힣”, 55203).
So, the check if "가" <= character <= "힣": ensures we only apply the decomposition math to Hangul syllables.
The Unicode code points for Hangul syllables advance first by final consonant, then by medial vowel, and last by initial consonant. For example:
- by 28 final consonant:
- 가: 44032
- 각: 44033 (advanced by 1)
- 갂: 44034
- …
- by 21 medial vowel:
- 가: 44032
- 개: 44060 (advanced by 28)
- 갸: 44088
- …
- by 19 initial consonant:
- 가: 44032
- 까: 44620 (advanced by 21 * 28)
- 나: 45208
- …
- 힣: 55203
Thus, every Hangul syllable code point can be thought of as:
code_point = 0xAC00 + (initial_index * 21 * 28) + (medial_index * 28) + final_index
where initial_index, medial_index, and final_index are zero-based positions in the respective jamo lists.
Therefore:
offset = ord(character) - ord("가")  # ord("가") == 0xAC00 == 44032
choseong = offset // 588  # initial_index (0–18)
jungseong = (offset - (588 * choseong)) // 28  # medial_index (0–20)
jongseong = offset - (588 * choseong) - (28 * jungseong)  # final_index (0–27)
(588 here is just the precomputed value for 21 * 28.)
For example:
| character | code point | offset | choseong | jungseong | jongseong |
|---|---|---|---|---|---|
| 가 | 44032 | 0 | 0 | 0 | 0 |
| 각 | 44033 | 1 | 0 | 0 | 1 |
| 힣 | 55203 | 11171 | 18 | 20 | 27 |
Once you have those three indices, you simply look up the corresponding jamo in the three lists:
CHOSEONGS[choseong], JUNGSEONGS[jungseong], JONGSEONGS[jongseong]
As a result, the decompose_syllables takes a string like 사과 and turns it into ["ㅅ", "ㅏ", "ㄱ", "ㅘ"].
This utility function is used to decompose the syllables and feed that into the suggest field while the original keyword goes into keyword field:
# update_keywords1.py
from Hangul import decompose_syllables

...

def _update_search_keywords(es_client: Elasticsearch, keywords: list[Keyword]) -> int:
    """
    Update the autocomplete index with new data.
    Return the number of successfully executed actions (including overrides).
    """
    index = "search-keywords"

    actions = []
    for keyword in keywords:
        action = {
            "_op_type": "index",
            "_index": index,
            "_id": keyword.key,
            "_source": {
                "suggest": {
                    "input": [
                        "".join(decompose_syllables(keyword.key)),  # changed
                    ],
                    "weight": keyword.count,
                },
                "keyword": keyword.key,
            },
        }
        actions.append(action)

    res = helpers.bulk(es_client, actions)

    return res[0]
Running this code will output the same as the previous one:
Success count: 7
Next, modify the FastAPI endpoint to:
- Decompose the user query.
- Use the decomposed form for prefix search.
- Return the original keywords (from
keywordfield) as the suggestions.
# app.py
from Hangul import decompose_syllables

...

@app.get(
    "/keyword-suggestions",
    response_model=list[str],
    summary="Suggest keywords for a given query",
    description="Returns a list of keyword suggestions based on the input query.",
)
async def suggest_keywords(
    es_client: Annotated[AsyncElasticsearch, Depends(get_es_client)],
    query: Annotated[str, Query(description="User input query for keyword suggestions")],
    limit: Annotated[int, Query(description="Maximum number of keywords to return", gt=0)] = 10,
):
    body = {
        "suggest": {
            "keyword-suggest": {
                "prefix": "".join(decompose_syllables(query)),  # changed
                "completion": {
                    "field": "suggest",
                    "size": limit,
                },
            }
        }
    }
    res = await es_client.search(index="search-keywords", body=body)
    results = []
    for option in res["suggest"]["keyword-suggest"][0]["options"]:
        results.append(option["_source"]["keyword"])  # changed

    return results
With these changes, autocomplet becomes more responsive, like this:
| query | results |
|---|---|
| ㄱ | 가방, 가구, 간식, 겨울 코트 |
| 가 | 가방, 가구, 간식 |
| 갑 | 가방 |
One limitation of this improvement is that people sometimes search with first consonants, like ㄱㄱ for 가구 and ㅅㄱ for 사과.
Version2: Initial consonant search
Initial consonant (초성) search is one of the unique traits of the Korean language.
Instead of typing full syllables, people often just type the initial sounds.
For example, to search for “맥도날드” (McDonald’s), you might just type ㅁㄷㄴㄷ.
To make this work, add this function to Hangul.py:
# Hangul.py

...

def extract_choseongs(text: str) -> list[str]:
    """
    Extracts the initial consonants (choseong) from Korean text.

    Example:
        "사과" -> ["ㅅ", "ㄱ"]
    """
    result = []
    for character in text.replace(" ", "").strip():
        if "가" <= character <= "힣":  # For Hangul syllables
            code = ord(character) - ord("가")
            choseong = code // (21 * 28)
            result.append(CHOSEONGS[choseong])
        else:
            result.append(character)

    return result
This function simply extracts first consonant (choseong) from each Hangul syllable and returns as a list of them. For example:
| Input | Output |
|---|---|
| “가구” | [“ㄱ”, “ㄱ”] |
| “가방” | [“ㄱ”, “ㅂ”] |
| “사과” | [“ㅅ”, “ㄱ”] |
Now we update our keyword indexing logic to include initial consonants in the suggest.input array:
# update_keywords2.py
from Hangul import decompose_syllables, extract_choseongs

...

def _update_search_keywords(es_client: Elasticsearch, keywords: list[Keyword]) -> int:
    """
    Update the autocomplete index with new data.
    Return the number of successfully executed actions (including overrides).
    """
    index = "search-keywords"

    actions = []
    for keyword in keywords:
        action = {
            "_op_type": "index",
            "_index": index,
            "_id": keyword.key,
            "_source": {
                "suggest": {
                    "input": list(
                        set(  # Remove duplicate items if keyword is not Korean
                            [
                                "".join(decompose_syllables(keyword.key)),
                                "".join(extract_choseongs(keyword.key)),  # new line
                            ]
                        )
                    ),
                    "weight": keyword.count,
                },
                "keyword": keyword.key,
            },
        }
        actions.append(action)

    res = helpers.bulk(es_client, actions)

    return res[0]
This way, our autocomplete can handle initial consonant input. For example:
| query | results |
|---|---|
| ㄱㄱ | 가구 |
| ㄱㅇㅋㅌ | 겨울 코트 |
Our query auto-completion feature now feels a lot better now, but there’s still room to improve.
What’s the common problem we haven’t catched yet?
It’s that users sometimes type Korean words on an English keyboard — like tkrhk when they meant 사과.
Version3: Latin-to-Jamo mapping
To type in Korean, users need to switch their keyboard to the Korean layout. But it’s super common for people to forget and just start typing in English mode whether they’re on a phone or a PC.
For example, someone trying to search for 가구 might accidentally type rkrn—because that’s what shows up when you type 가구 on a standard Korean keyboard while in English mode.
To automatically correct such typos, we map Korean syllables to their corresponding Latin keyboard inputs so the autocomplete system can recognize and suggest the intended Korean keywords even when users accidentally type using the English keyboard layout.
Here’s a utility function that maps Hangul jamo to their Latin keyboard equivalents.
Add this to Hangul.py:
# Hangul.py

...

ENG_TO_KOR = {}
# Consonants
ENG_TO_KOR.update({"r": "ㄱ", "R": "ㄲ", "rt": "ㄳ", "s": "ㄴ"})
ENG_TO_KOR.update({"sw": "ㄵ", "sg": "ㄶ", "e": "ㄷ", "E": "ㄸ"})
ENG_TO_KOR.update({"f": "ㄹ", "fr": "ㄺ", "fa": "ㄻ", "fq": "ㄼ"})
ENG_TO_KOR.update({"ft": "ㄽ", "fx": "ㄾ", "fv": "ㄿ", "fg": "ㅀ"})
ENG_TO_KOR.update({"a": "ㅁ", "q": "ㅂ", "Q": "ㅃ", "qt": "ㅄ"})
ENG_TO_KOR.update({"t": "ㅅ", "T": "ㅆ", "d": "ㅇ", "w": "ㅈ"})
ENG_TO_KOR.update({"W": "ㅉ", "c": "ㅊ", "z": "ㅋ", "x": "ㅌ"})
ENG_TO_KOR.update({"v": "ㅍ", "g": "ㅎ"})
# Vowels
ENG_TO_KOR.update({"k": "ㅏ", "o": "ㅐ", "i": "ㅑ", "O": "ㅒ"})
ENG_TO_KOR.update({"j": "ㅓ", "p": "ㅔ", "u": "ㅕ", "P": "ㅖ"})
ENG_TO_KOR.update({"h": "ㅗ", "hk": "ㅘ", "ho": "ㅙ", "hl": "ㅚ"})
ENG_TO_KOR.update({"y": "ㅛ", "n": "ㅜ", "nj": "ㅝ", "np": "ㅞ"})
ENG_TO_KOR.update({"nl": "ㅟ", "b": "ㅠ", "m": "ㅡ", "ml": "ㅢ"})
ENG_TO_KOR.update({"l": "ㅣ"})

# Create a reverse mapping from Korean to English
KOR_TO_ENG = {v: k for k, v in ENG_TO_KOR.items()}

def convert_jamo_to_latin(text: str) -> str:
    """
    Convert Hangul jamo (consonants and vowels) to a romanized form based on the standard Korean keyboard layout.

    Example:
        "사과" -> "tkrhk"
    """
    jamos = decompose_syllables(text=text)
    result = []
    for jamo in jamos:
        if jamo in KOR_TO_ENG:
            result.append(KOR_TO_ENG[jamo])
        else:
            result.append(jamo)
    return "".join(result)
What this does:
- Decompose Korean syllables into jamos.
- Convert each jamo to its QWERTY key equivalent.
- Join the result back into a string.
For example:
| Input | Output |
|---|---|
| 가구 | rkrn |
| 가방 | rkqkd |
| 사과 | tkrhk |
After that, update _update_search_keywords function to include these typo-prone Latin inputs in the suggest.input array:
# update_keywords3.py
from Hangul import convert_jamo_to_latin, decompose_syllables, extract_choseongs

...

def _update_search_keywords(es_client: Elasticsearch, keywords: list[Keyword]) -> int:
    """
    Update the autocomplete index with new data.
    Return the number of successfully executed actions (including overrides).
    """
    index = "search-keywords"

    actions = []
    for keyword in keywords:
        action = {
            "_op_type": "index",
            "_index": index,
            "_id": keyword.key,
            "_source": {
                "suggest": {
                    "input": list(
                        set(  # Remove duplicate items if keyword is not Korean
                            [
                                "".join(decompose_syllables(keyword.key)),
                                "".join(extract_choseongs(keyword.key)),
                                "".join(convert_jamo_to_latin(keyword.key)),  # new line
                            ]
                        )
                    ),
                    "weight": keyword.count,
                },
                "keyword": keyword.key,
            },
        }
        actions.append(action)

    res = helpers.bulk(es_client, actions)

    return res[0]
After running the keyword update script, here’s what the document for “사과” might look like:
{
  "_index": "search-keywords",
  "_id": "사과",
  "_score": 1,
  "_source": {
    "suggest": {
      "input": [
        "ㅅㅏㄱㅘ",
        "ㅅㄱ",
        "tkrhk"
      ],
      "weight": 1
    },
    "keyword": "사과"
  }
}
Note that each input value is the result of the following utility functions:
"".join(decompose_syllables("사과"))->ㅅㅏㄱㅘ"".join(extract_choseongs("사과"))->ㅅㄱ"".join(convert_jamo_to_latin("사과"))->tkrhk
Even if the user mistakenly types in English mode, your autocomplete will still just work.
Meanwhile, the English keyword airpods 4 stays mostly intact because we removed duplicate items when indexing input values:
{
  "_index": "search-keywords",
  "_id": "airpods 4",
  "_score": 1,
  "_source": {
    "suggest": {
      "input": [
        "airpods4"
      ],
      "weight": 1
    },
    "keyword": "airpods 4"
  }
}
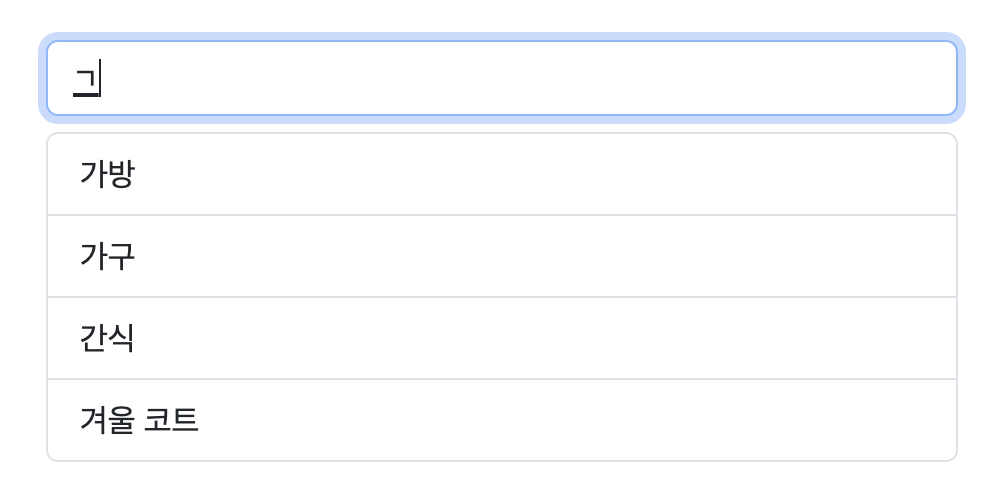
Demonstration with search box
Up until now, we’ve been testing things without a proper UI with actual search box.
Here’s a simple HTML + JavaScript setup you can use to test the example in action. It talks to a backend endpoint that returns suggestions based on user input.
Just save the code below as an .html file and open it in your browser:
<!DOCTYPE html>

<head>
    <meta charset="UTF-8">
    <title>Search Suggestions</title>
    <link href="https://cdn.jsdelivr.net/npm/bootstrap@5.3.7/dist/css/bootstrap.min.css" rel="stylesheet">
</head>

<body>
    <div class="container mt-5">
        <div class="row">
            <div class="col-md-6 mx-auto">
                <input id="search" type="text" class="form-control" placeholder="Search">
                <ul id="results" class="list-group mt-2"></ul>
            </div>
        </div>
    </div>

    <script>
        const API_URL = 'http://localhost:8000/keyword-suggestions';

        document.getElementById('search').addEventListener('input', e => {
            fetch(`${API_URL}?limit=10&query=${e.target.value}`)
                .then(res => res.json())
                .then(data => {
                    const results = document.getElementById('results');
                    results.innerHTML = '';
                    data.forEach(text => {
                        const li = document.createElement('li');
                        li.className = 'list-group-item';
                        li.style.cursor = 'pointer';
                        li.textContent = text;
                        li.addEventListener('click', () => {
                            document.getElementById('search').value = text;
                            results.innerHTML = '';
                        });
                        results.appendChild(li);
                    });
                })
                .catch(err => console.error(err));
        });
    </script>
</body>

</html>
This is just a simple example page, but it gives you a working UI to see your suggestions in real time. Just make sure your backend is running and serving suggestions at the URL specified (http://localhost:8000/keyword-suggestions).
Context suggester
Autocomplete suggestions can be fine-tuned with filters and boostings. One useful example is to personalize suggestions—so instead of everyone seeing the same results, each user gets suggestions based on their own search history or behavior.
To make that happen, you can add context mappings to the search-keywords index.
Here’s a simple example where we define a context using user_id:
PUT /search-keywords
{
  "mappings": {
    "properties": {
      "suggest": { // you can use any name here instead of "suggest"
        "type": "completion",
        "analyzer": "standard",
        "contexts": [
          {
            "name": "user_id",
            "type": "category"
          }
        ]
      },
      "keyword": {
        "type": "keyword"
      }
    }
  }
}
Here, we’re using the category context type, which lets us tag suggestions with one or more user IDs when we index them.
When a user types something, we can filter or boost suggestions based on their context.
Let’s look at the indexing part.
Here’s how you’d update the search-keywords index with user-personalized data:
def _update_search_keywords(
    es_client: Elasticsearch, keywords: list[Keyword], user_ids: list[str]
) -> int:
    """
    Update the autocomplete index with new data.
    Return the number of successfully executed actions (including overrides).
    """
    index = "search-keywords"

    actions = []
    for keyword in keywords:
        action = {
            "_op_type": "index",
            "_index": index,
            "_id": keyword.key,
            "_source": {
                "suggest": {
                    "input": [
                        "".join(decompose_syllables(keyword.key)),
                        "".join(extract_choseongs(keyword.key)),
                        "".join(convert_jamo_to_latin(keyword.key)),
                    ],
                    "weight": keyword.count,
                    "contexts": {  # new line
                        "user_id": user_ids,
                    },
                },
                "keyword": keyword.key,
            },
        }
        actions.append(action)

    res = helpers.bulk(es_client, actions)

    return res[0]
In the querying part, just plug the user_id context into your search body like so:
...

body = {
    "suggest": {
        "keyword-suggest": {
            "prefix": "".join(decompose_syllables(query)),
            "completion": {
                "field": "suggest",
                "size": limit,
                "contexts": {"user_id": ["user1"]},  # new line
            },
        }
    }
}
This way, you’ve added personalized query suggestions to your search experience.
As of Elasticsearch 8.13.4, you can define up to 10 context mappings per completion field.
To tear down the indices after the demonstration:
DELETE /search-logs
DELETE /search-keywords
Conclusion
While you can adapt the example in this post for your own application, there’s more you can (and probably should) do—like handling special characters, supporting partial matches, and filtering out weird or meaningless suggestions. However, once you’ve got the basics down, adding those extra layers gets a lot easier.